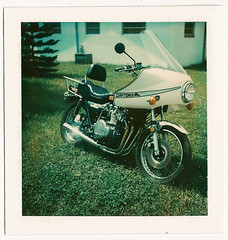
Not each and every sportbike motorcycle fairing is mounted to the bike in the exact same way, but are similar. As with all disassemblies, use a camera to take pictures, take notes if you don’t remember things well and find a can or container to put nuts and screws in…it will give you one place to go back to for reassembly.
Instructions to Replace Motorcycle Fairings
- Start at the front of the bike. Locate the inner fairing panels and panels surrounding the front tire and wheel. Most times – this will be a metric allen wrench. As you get the bolts removed – gently pull the inner fairing panels away from the motorcycle.
- Look for the bolts that attache the side panels and lowers…remove them and remove the lower fairing. Sometimes it is necessary to tilt it down to get it separated from the main fairing. Take your time – the lower is usually thin and can break easily.

Note: If you don’t see bolts, there are sometimes plastic “push” rivets. The center of the fastener needs to be pushed put and then the rivet will pull out of the hole. Be cautious – the center pins will tend to find the underside of the toolbox or the floor drain if you are not careful.
- Remove the fastener that joins the side fairing panels to the main fairing. Gently pull the sides away from the motorcycle, if they are not loose – make sure the turn signal wires are not still attached. If they are – you will need to remove the turn signal stock from the panel and/or unplug the wiring. If the turn signal is still attached – then remove it and save it – it will need to be re-installed later.
- Determine how the mirrors attach. Some are connected to the fairings…some to the handlebars. If yours are part of the main fairing, figure out how they attach and loosen the bolts. They will need to be taken off prior to removing the main fairing.
- Windshields come in many different ways – sportbike windshields are small and have a series of bolts around the perimeter. If you have a larger bike with a larger windshield – like a sport touring bike, then there is usually two plastic covers that need to come off. These are cosmetic and cover the large bolts underneath.
Be careful when you start to remove the main bolts (under the covers) – as soon as them loosen up, the windshield will be loose and sometimes sticks a little. As soon as you look away – the windshield will “unstick” and fall to the floor, no doubt breaking. 🙂
- Now you need to find the main bolts – attached to the fairing “stay”…or fancy way to say main bracket. Once these are off – the fairing should come off clean.
- Check the owners manual to remove the seat. It will need to be taken off to get the rest of the fairing off. Some bikes have 2 seats – most modern bikes clip or snap to the bike. Look for a release – sometimes by use of the ignition key.
- There should be a handful of bolts which hold the tail fairing on the bike. Like the front – the lighting assembly may be a part of the tail fairing. Look for connected wires as to not damage anything for reinstallation.
As in turtle racing – slow and stead wins the race. Again, take pictures…it will save your butt when you try to put things back together after two months at the body shop. No matter how “easy” it came apart…it never seems to look the same.
Good luck.


